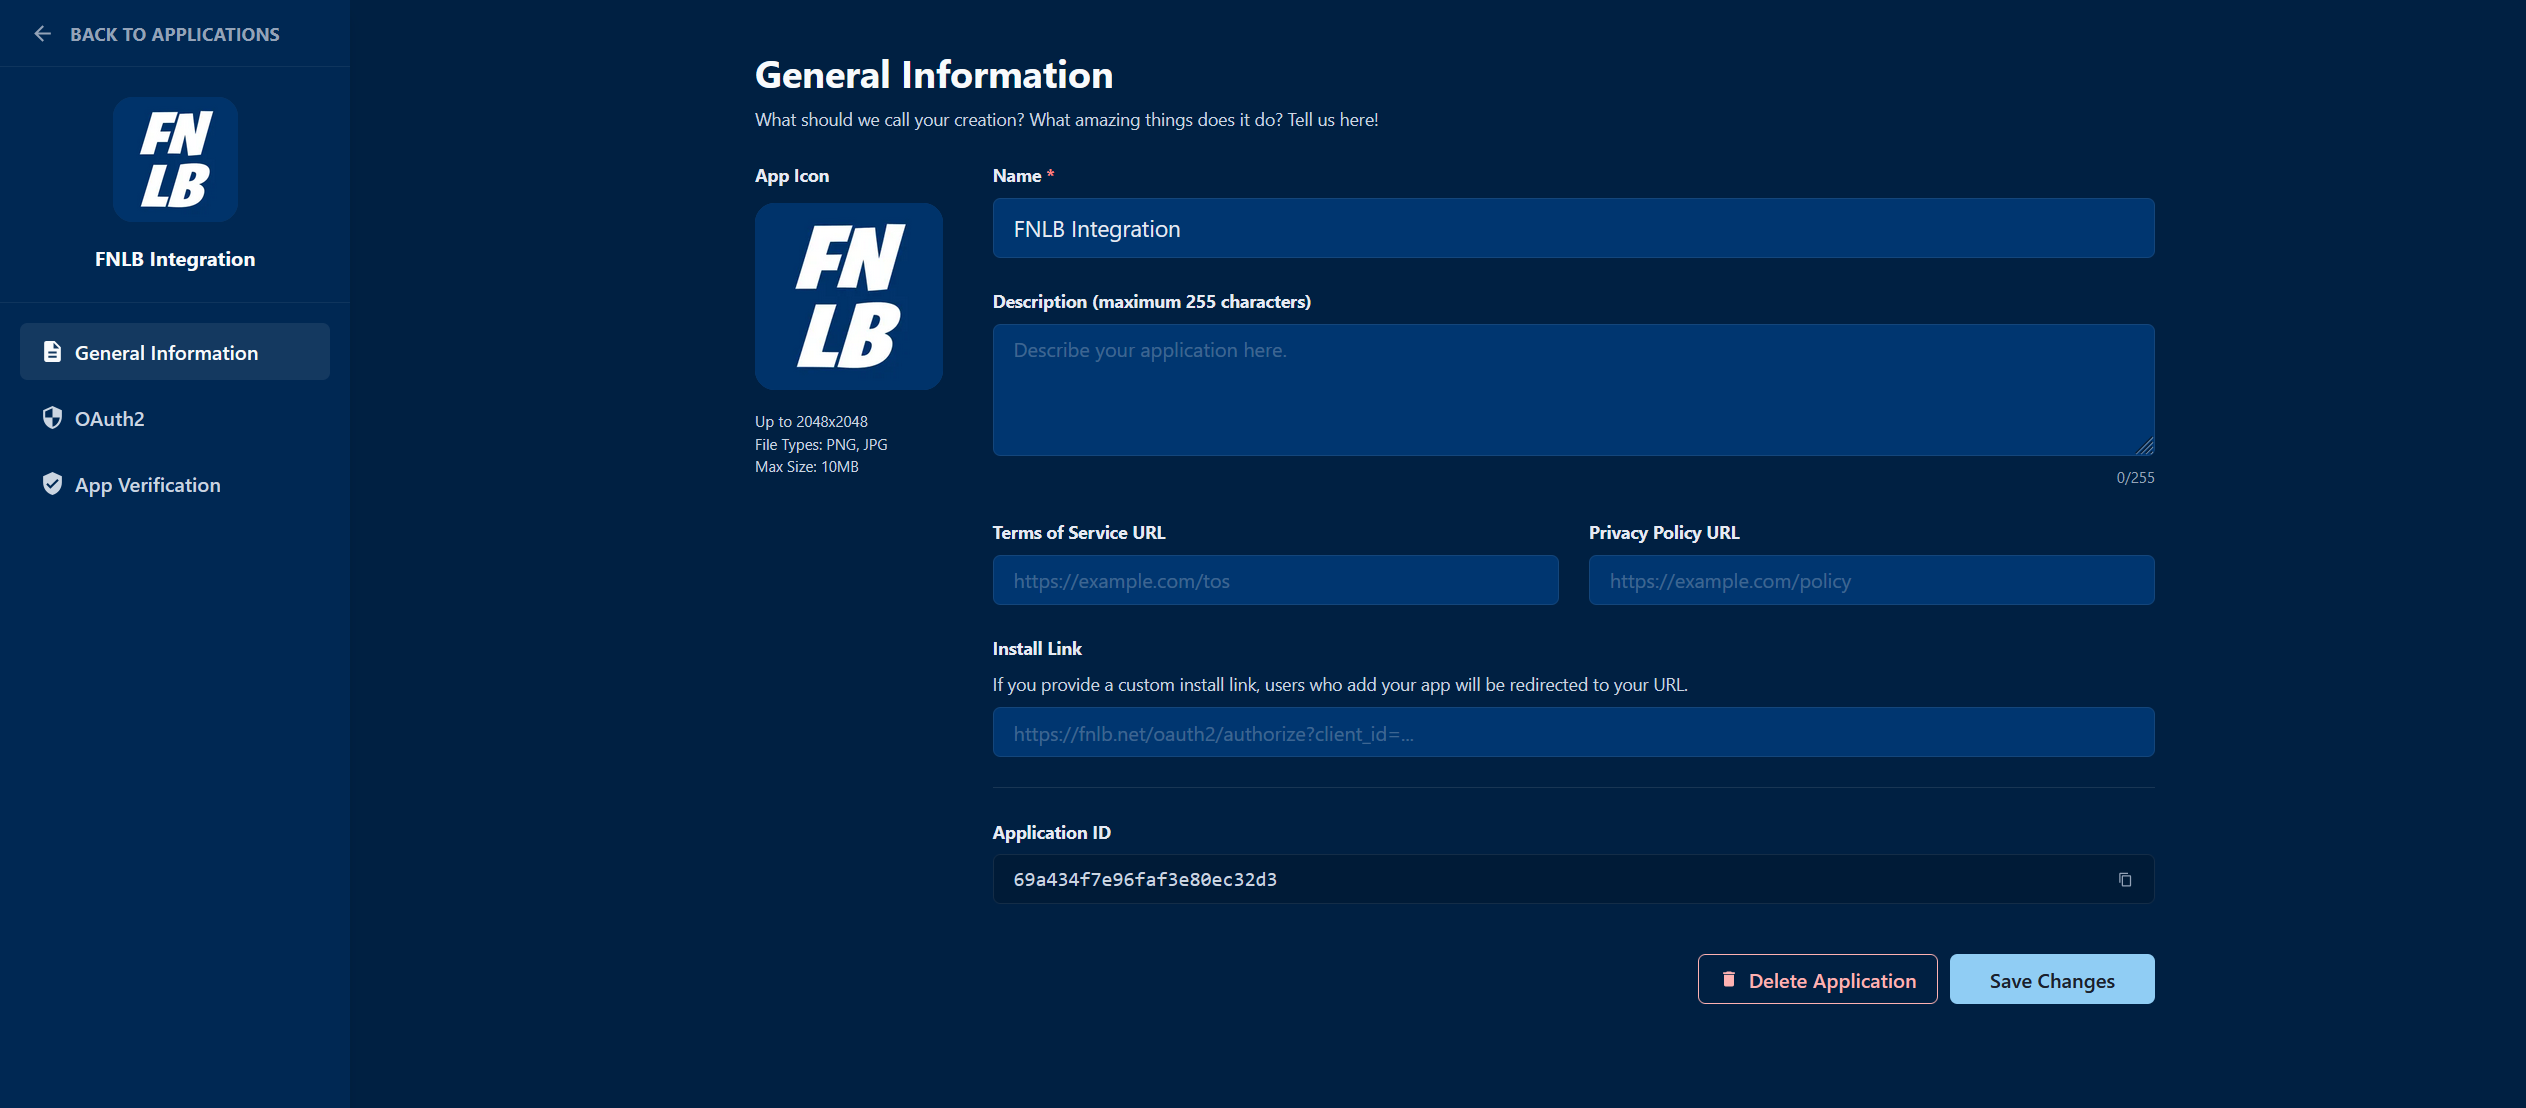
Creating an OAuth2 Application
- Go to the Developer Portal
- Click on “Create Application”
- Fill in the name
- Click on “Create”
- Copy the Client ID and Client Secret
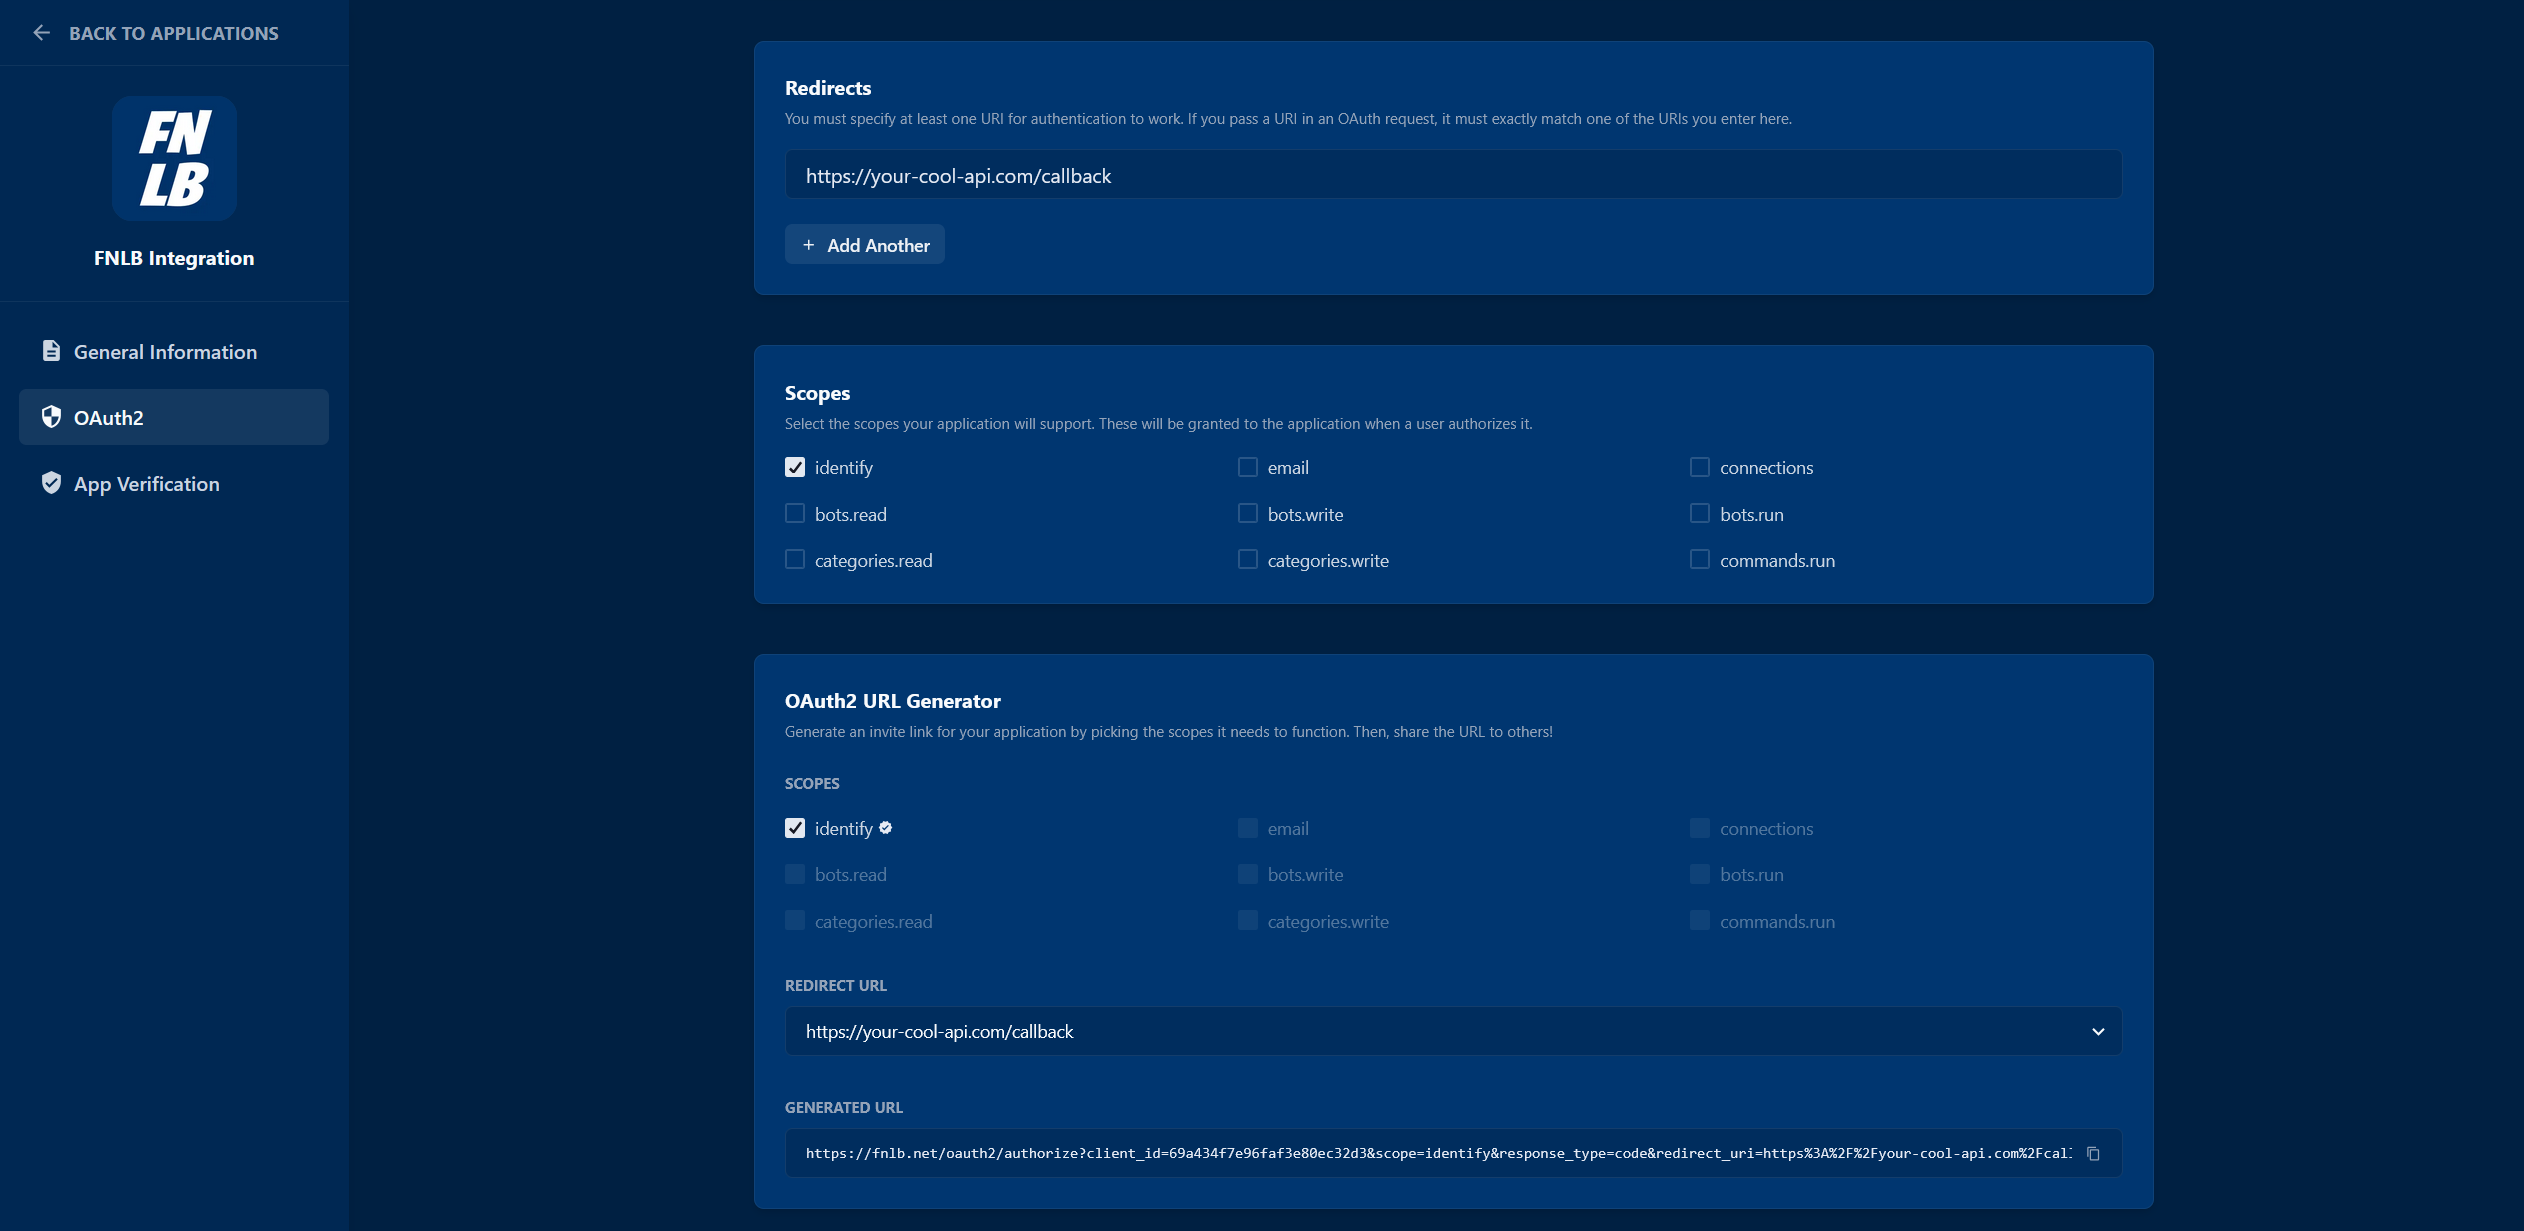
- Go to OAuth2 and add your Redirect URIs
The OAuth2 Flow
FNLB supports the Authorization Code Grant flow, which is the most secure way for server-side applications to authenticate.1. Authorization Request
Redirect the user to the FNLB authorization endpoint. You can generate one using the FNLB OAuth2 URL Generator.| Parameter | Description |
|---|---|
client_id | Your application’s Client ID from the Developer Portal. |
redirect_uri | One of your pre-configured Redirect URIs. |
scope | A space-separated list of scopes you are requesting. |
state | A random string to prevent CSRF attacks. |
2. User Approval
The user will be prompted to log in (if not already) and authorize your application. Upon approval, they will be redirected back to yourredirect_uri with a code parameter.
3. Token Exchange
Exchange the authorization code for an access token by making a POST request to:4. Accessing Resources
Use the returnedaccess_token in the Authorization header of your API requests. The Bearer prefix is optional:
Scopes
Scopes define the level of access your application has.| Scope | Description |
|---|---|
identify | Access the user’s basic profile details (e.g., ID, username, flags). |
email | Access the user’s email address. |
connections | Access the user’s linked third-party connections. |
bots.read | View the user’s bots and their associated metadata. |
bots.write | Create, update, or permanently delete the user’s bots and their settings. |
bots.run | Start and stop bots programmatically using the self-hosting SDK. |
categories.read | View the user’s categories and their config. |
categories.write | Create, update, or delete categories and their config. |
commands.run | Run bot commands on behalf of the user. |
Next Steps
API Reference
Learn how to use the FNLB API.